I discovered the charm of Simple Sweetened Condensed Milk Treats during a cozy family gathering, where its creamy sweetness was the star of the dessert table.
The rich, velvety texture and the subtle caramel notes are a delightful indulgence for any sweet tooth.
Whether you’re looking to quickly satisfy a sugar craving or impress guests with minimal effort, this recipe is your go-to.
Perfect for any season, these treats offer a comforting warmth in winter and a decadent coolness in summer.
No need for elaborate techniques or hard-to-find ingredients; just pure, simple bliss with every bite.
The History and Cultural Significance
• Simple Sweetened Condensed traces its origins to mid-19th century Europe, where it was originally created by Gail Borden Jr. in response to milk preservation challenges.
• The dish evolved over decades as canned condensed milk became widely available, eventually becoming the beloved version we know today.
• In many Latin American cultures, this dish traditionally appears at family gatherings and festive occasions, symbolizing togetherness and celebration.
• While many variations exist across different regions, the authentic version maintains the creamy, indulgent texture that sets it apart from imitations.


Recipe Overview
Nutritional Information (per serving)
Essential Equipment Guide
Mixing Bowl: A sturdy mixing bowl is essential for combining ingredients evenly. Alternatives like glass or stainless steel bowls work well, and look for a non-slip base for stability.
Whisk: A whisk is important for achieving a smooth and consistent mixture. If unavailable, a fork can be used, though it requires more effort. Choose a whisk with a comfortable grip and flexible wires.
Baking Pan: A baking pan is necessary for setting the treats; a silicone pan is ideal for easy release. Ensure it has a non-stick surface to prevent sticking and maintain the treat’s shape.
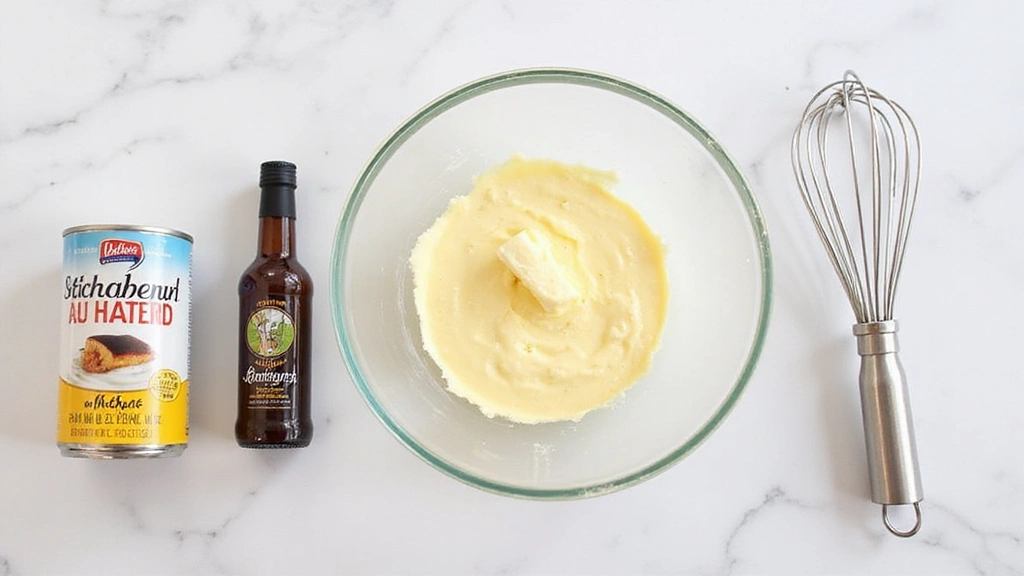
Ingredients
For the Base
|
| Amount | Ingredient | Notes |
|---|---|---|
| 1 can | sweetened condensed milk | provides creamy sweetness |
| 2 tablespoons | butter | adds richness |
| 1 teaspoon | vanilla extract | enhances flavor |
Preparation Methods
Gentle Heating: Gradual heating is crucial to prevent the sweetened condensed milk from scorching. Use low heat and constant stirring to maintain a smooth texture.
Mixing Consistency: Achieving the right consistency is key; the mixture should be thick but pourable. Use moderate whisking to blend ingredients without incorporating too much air.
Cooling and Setting: Allowing the treats to cool naturally in the pan ensures they set properly. Avoid refrigerating too soon to prevent uneven texture.


Step 1: Prepare Ingredients
Gather all ingredients and equipment.
Ensure the butter is at room temperature for easy mixing.
Check that the sweetened condensed milk can is fully opened.
Measure the vanilla extract accurately to avoid overpowering the flavor.
Step 2: Melt Butter
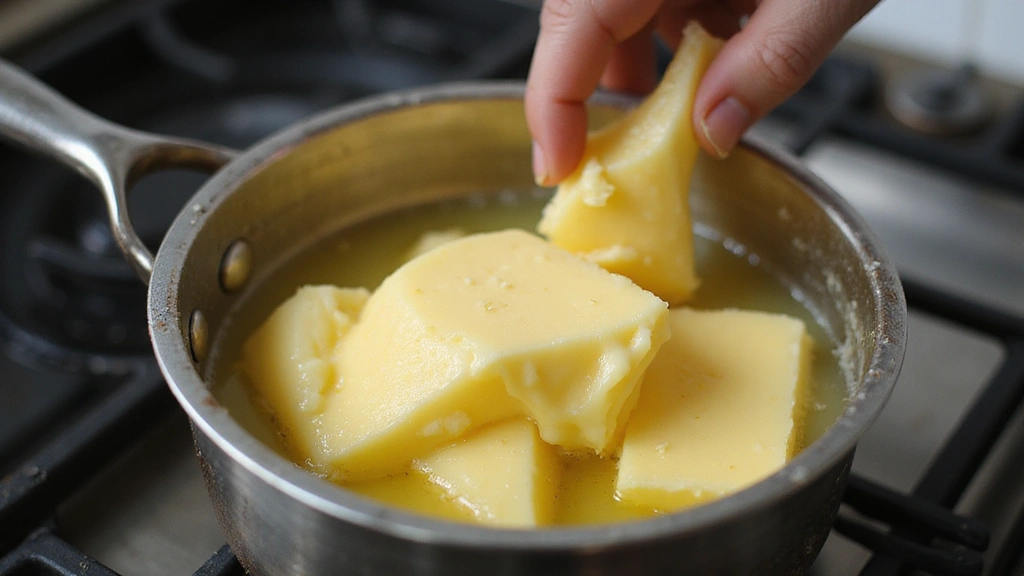
Place butter in a small saucepan over low heat.
Stir gently until completely melted.
Watch carefully to prevent browning.
Remove from heat once melted.
Step 3: Combine Ingredients
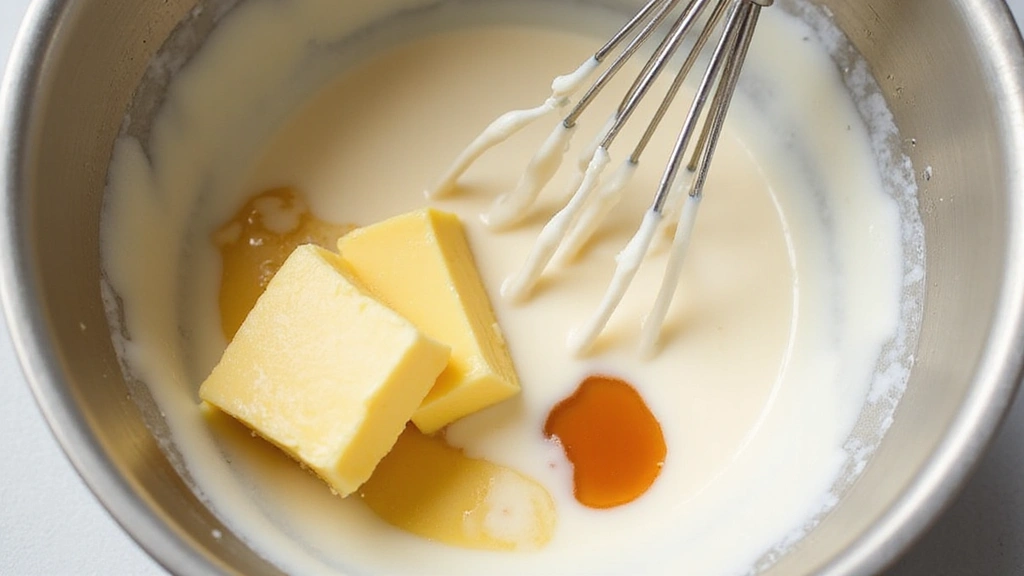
In a mixing bowl, combine melted butter and sweetened condensed milk.
Add vanilla extract to the mixture.
Whisk gently until fully combined and smooth.
Ensure no lumps remain for a consistent treat.
Step 4: Heat Mixture
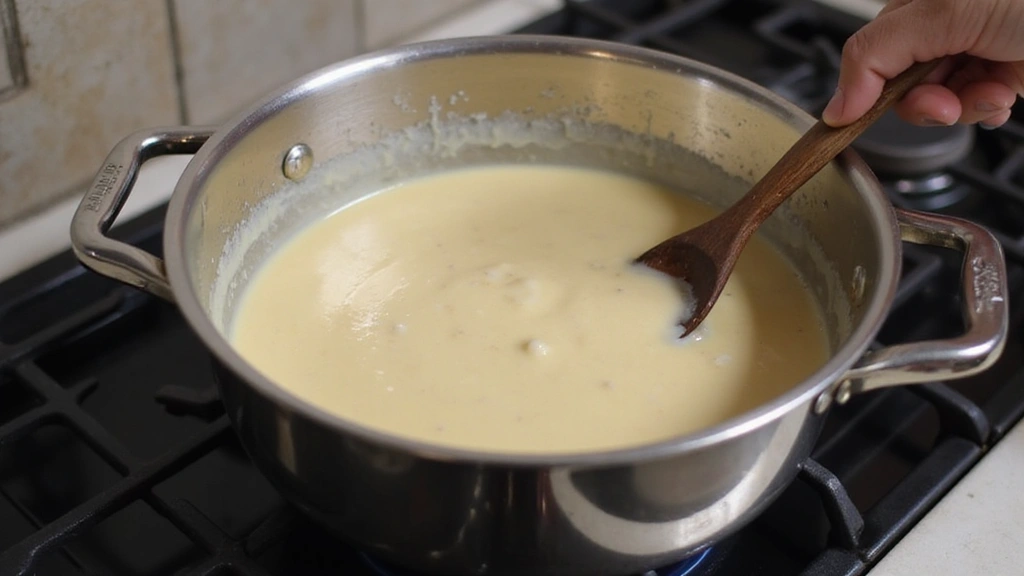
Transfer the mixture back to the saucepan.
Set the heat to low and stir continuously.
Heat until the mixture thickens slightly, about 5 minutes.
Avoid boiling to maintain a creamy texture.
Step 5: Pour into Pan
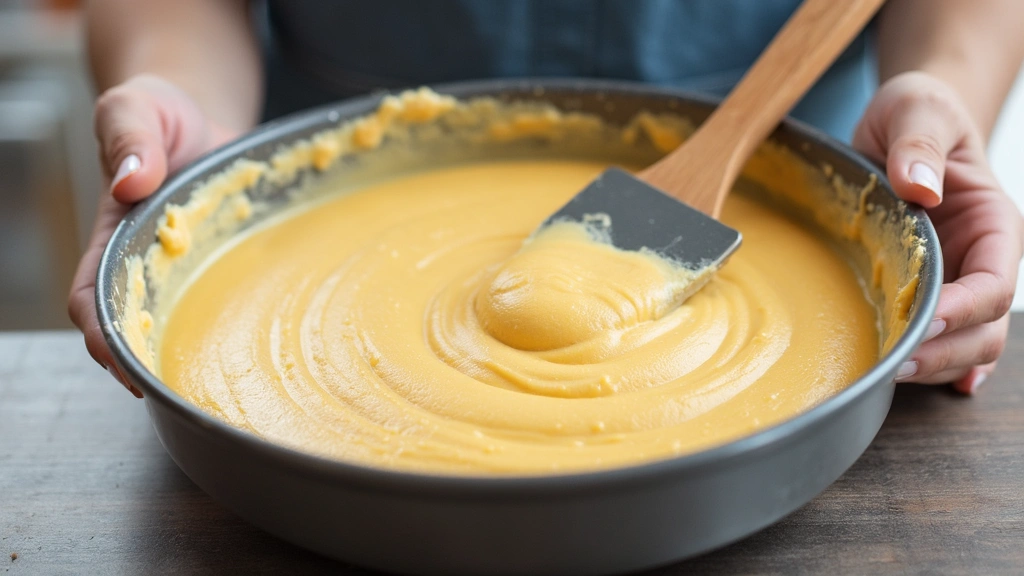
Lightly grease a baking pan with butter or non-stick spray.
Pour the heated mixture evenly into the pan.
Tap the pan gently to remove air bubbles.
Smooth the surface with a spatula for even setting.
Step 6: Cool and Set
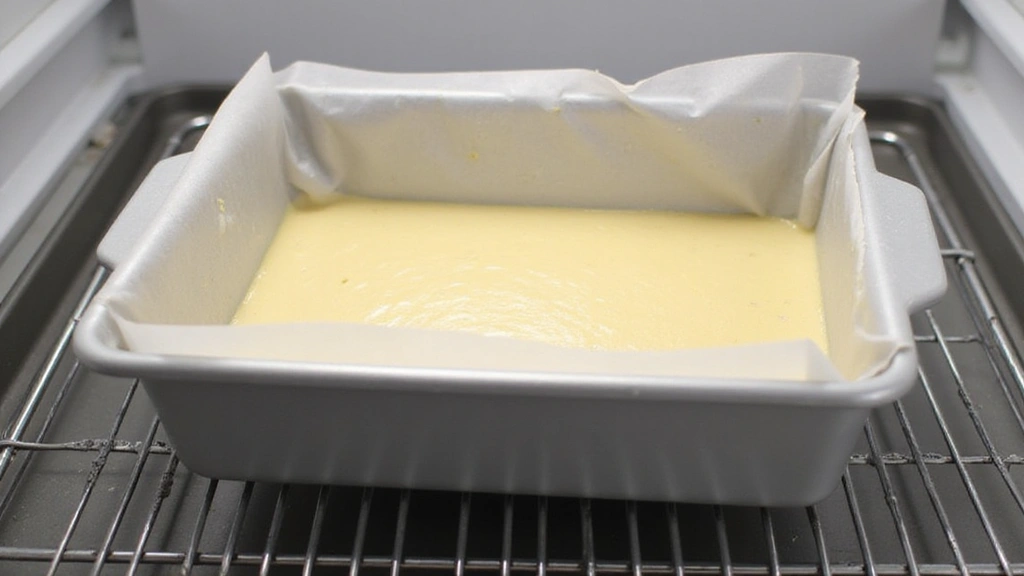
Allow the pan to cool at room temperature for 30 minutes.
Place the pan in the refrigerator to set for an additional 2 hours.
Check that the treats are firm to the touch before slicing.
Refrigerate longer if necessary for proper setting.
Step 7: Slice Treats
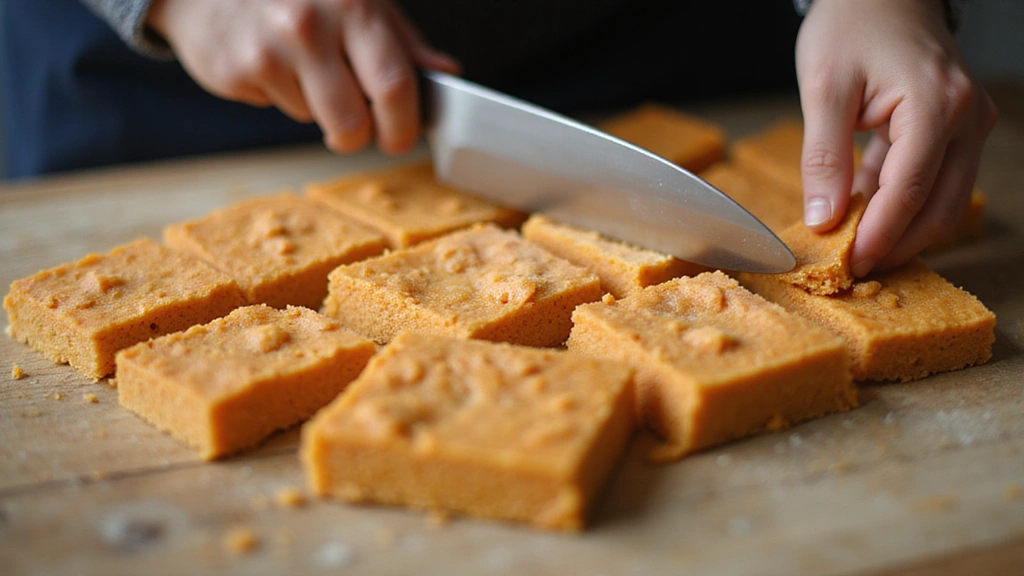
Remove the pan from the refrigerator.
Use a sharp knife to slice the treats into squares.
Wipe the knife clean between cuts for neat edges.
Ensure even sizing for consistent serving portions.


Step 8: Serve and Enjoy

Arrange the sliced treats on a serving platter.
Garnish with a sprinkle of cocoa or cinnamon if desired.
Serve chilled or at room temperature.
Enjoy the creamy, sweet indulgence with friends and family.


Critical Timing and Temperature Guide
Butter Melting: Melt butter over low heat for approximately 2-3 minutes. Visual indicators include complete melting without browning. Avoid high heat to prevent burning.
Mixture Heating: Heat the combined mixture for 5-7 minutes on low, stirring constantly. Look for slight thickening and a smooth texture. Avoid boiling to prevent curdling.
Setting Time: Allow to set in the refrigerator for at least 2 hours. The mixture should be firm to the touch. Avoid cutting too soon to ensure proper texture.
Pro Tips for Simple Sweetened Condensed
• Ingredient Selection: Choose high-quality sweetened condensed milk for the best flavor and texture, as it is the main component of the dish.
• Preparation Secret: Stirring continuously while heating prevents the mixture from sticking and ensures even consistency.
• Temperature Management: Use low heat throughout the cooking process to maintain the smoothness of the mixture.
• Texture Enhancement: Allow the mixture to cool completely before slicing to achieve clean edges and a firm texture.
• Flavor Layering: Adding a pinch of salt can enhance the sweetness and balance flavors.
• Make-Ahead Strategies: Prepare the mixture a day in advance and refrigerate overnight for a firmer texture and more developed flavor.
• Restaurant-Quality Finishing Touches: Dust the finished treats with cocoa powder or grated chocolate for an elegant presentation.
• Equipment Optimization: Use a non-stick saucepan to prevent the mixture from catching and ensure easy cleaning.
Troubleshooting Common Issues
• Mixture Too Runny: This can occur if the mixture isn't heated long enough. Ensure you heat until slightly thickened and allow ample time for setting.
• Mixture Scorched: Scorching happens from high heat. Keep the heat low and stir constantly to avoid sticking and burning.
• Uneven Setting: Occurs when refrigerated too quickly. Allow the mixture to cool at room temperature before chilling to ensure even setting.
• Edges Too Hard: This results from overcooking. Monitor closely during heating and set a timer to prevent over-thickening.
• Flavor Too Sweet: If too sweet, consider balancing with a touch of salt or citrus zest to add acidity and complexity.
Variations and Regional Differences
• Latin American Variation: Often includes a layer of dulce de leche for added richness and caramel flavor, reflecting the region's love for sweet, creamy desserts.
• Asian Fusion: Incorporates coconut milk and pandan for a tropical twist, offering a fragrant and slightly nutty flavor profile.
• European Style: Features a biscuit crumb base to add a crunchy texture contrast to the creamy topping.
• Middle Eastern Influence: Infused with cardamom and rosewater, providing a floral and aromatic dimension to the traditional recipe.


Food Science Behind the Recipe
• Caramelization: The heating process gently caramelizes the sugars in the sweetened condensed milk, enhancing the depth of flavor and color.
• Emulsification: Combining butter with the milk creates an emulsion that contributes to the treat's smooth, creamy texture.
• Crystallization Prevention: Continuous stirring and low heat prevent sugar crystallization, ensuring a silky finish rather than a gritty texture.
Frequently Asked Questions
What's the most common mistake people make when preparing Simple Sweetened Condensed Milk Treats? The most common mistake is overheating the mixture, which can lead to scorching and an unpleasant flavor.
Can I use unsalted butter instead of salted? Yes, unsalted butter works well and allows you to control the salt level according to taste.
How do I store leftover treats? Store them in an airtight container in the refrigerator for up to a week for optimal freshness and texture.
Is it possible to freeze these treats? While freezing is possible, it may alter the texture slightly. It's best enjoyed fresh or refrigerated.
Can I add nuts or other mix-ins? Yes, chopped nuts or dried fruits can be added to the mixture for additional texture and flavor.
Why did my treats turn out too sticky? Sticky treats may result from insufficient setting time. Ensure they are fully cooled and set before slicing.
What can I use if I don't have a baking pan? A glass or ceramic dish can be used as an alternative, but ensure it is greased to prevent sticking.
Serving and Presentation Guide
• Traditional Presentation: Serve sliced squares on a simple white platter for a clean, classic look.
• Festive Display: Arrange on a tiered cake stand with edible flowers for a celebratory touch.
• Individual Servings: Present in small ramekins or dessert cups for personalized portions.
• Garnished Elegance: Top with a drizzle of melted chocolate and a sprinkle of sea salt for a gourmet finish.
Conclusion
With its rich flavor and easy preparation, Simple Sweetened Condensed Milk Treats are a delightful addition to any dessert repertoire.
Perfect for both novice cooks and seasoned bakers, this recipe offers satisfaction in every bite.
Try it today and enjoy the sweet simplicity and indulgent taste that make this treat a true favorite.