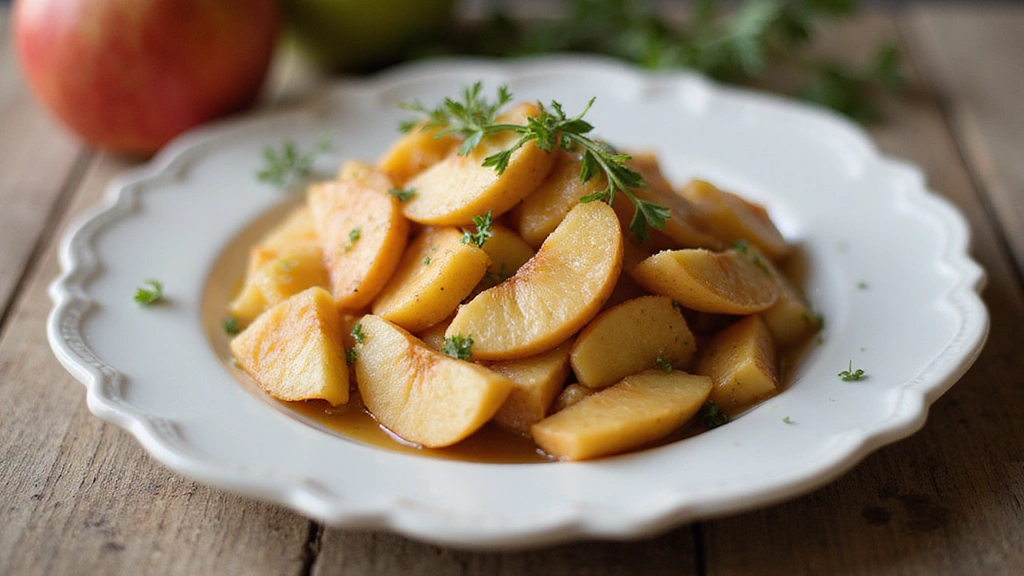


With the crisp air of autumn comes the perfect time to enjoy the warm, comforting flavors of a classic apple pie filling.
This simple recipe captures the essence of fall with its blend of sweet apples, aromatic spices, and a hint of tangy lemon.
Whether you’re baking a traditional pie or experimenting with new dessert creations, this filling is your versatile, go-to choice.
The balance of cinnamon, nutmeg, and the natural sweetness of apples creates a flavor profile that is both nostalgic and refreshing.
Having grown up with apple orchards nearby, this recipe transports me back to family gatherings and festive holidays.
Prepare to fill your kitchen with the irresistible aroma of this delightful apple pie filling.
The History and Cultural Significance
• Simple Apple Pie traces its origins to medieval England, where it was originally created by resourceful bakers using local fruits.
• The dish evolved over decades as sugar became more readily available, enhancing the natural sweetness of the apples and making it a staple dessert.
• In American culture, apple pie is emblematic of family gatherings and Thanksgiving celebrations, symbolizing comfort and abundance.
• While many variations exist across different regions, the authentic version maintains a balance of tart and sweet apples that sets it apart from imitations.


Recipe Overview
Nutritional Information (per serving)


Essential Equipment Guide
Peeler: A good peeler is essential for removing the apple skin smoothly without wasting too much fruit. Look for a swivel peeler for better control. Alternatives include a paring knife, although it’s less precise.
Medium Saucepan: A heavy-bottomed saucepan is crucial for even cooking and preventing the filling from burning. Non-stick options can also work well. Ensure it has high sides to contain splattering.
Wooden Spoon: Using a wooden spoon helps in stirring the filling without scratching the saucepan. Metal spoons can be too harsh, especially on non-stick surfaces. Look for a spoon with a long handle for safety.
Ingredients
For the Filling
|
|
| Amount | Ingredient | Notes |
|---|---|---|
| 6 cups | apples | peeled, cored, and sliced into thin pieces |
| 3/4 cup | granulated sugar | sweetens the filling |
| 2 tablespoons | lemon juice | adds a tangy brightness |
| 1/4 cup | all-purpose flour | thickens the filling |
| 1 teaspoon | ground cinnamon | provides warmth and spice |
| 1/4 teaspoon | ground nutmeg | enhances the cinnamon flavor |
| 1/4 teaspoon | salt | balances sweetness |


Preparation Methods
Peeling and Slicing Apples: This technique involves removing the apple skins and cutting them into uniform slices to ensure even cooking. Start by using a peeler for the skin, then a sharp knife for slicing. Keep slices thin for faster cooking.
Thickening with Flour: Adding flour to the apple mixture helps create a thick, cohesive filling. Mix the flour thoroughly with the apples before cooking to avoid lumps. Stir constantly while cooking to prevent sticking.
Flavor Balancing: The right balance of sugar, lemon, and spices is key to a perfect filling. Taste and adjust the seasoning as desired, considering the natural sweetness of the apples.


Step 1: Prepare the Apples

Begin by peeling the apples using a swivel peeler for efficiency.
Core the apples and slice them into uniform thin pieces.
Ensure all pieces are similar in size for even cooking.
Set the prepared apples aside in a mixing bowl.
Step 2: Mix Dry Ingredients

In a separate bowl, combine the granulated sugar, flour, cinnamon, nutmeg, and salt.
Stir well to ensure the spices are evenly distributed.
Look for a uniform color and texture in the mixture.
Set aside for later use in the cooking process.
Step 3: Combine Apples and Lemon Juice

Pour the lemon juice over the sliced apples.
Toss the apples gently to coat them evenly.
This step helps prevent the apples from browning.
Set the bowl aside for the next mixing stage.
Step 4: Add Dry Ingredients to Apples

Sprinkle the dry ingredient mixture over the lemon-coated apples.
Use a wooden spoon to stir until the apples are well coated.
Ensure there are no clumps of dry mixture left.
The apples should have an even dusting of the mixture for flavor.
Step 5: Cook the Apple Mixture

Transfer the coated apples to a medium saucepan.
Cook over medium heat, stirring frequently.
Watch for the mixture to start bubbling and thickening.
Continue cooking until the apples are tender but not mushy.
Step 6: Adjust Seasoning

Taste the cooked apple mixture to assess the flavor balance.
Add more sugar or spices if desired for a personalized taste.
Ensure the filling is not overly sweet or spicy.
Stir well to incorporate any additional ingredients.
Step 7: Cool the Filling

Remove the saucepan from heat once the apples are tender.
Allow the filling to cool slightly before using.
Transfer to a bowl or container for storage if not using immediately.
Cooling helps the filling set and enhances the flavor.
Step 8: Use or Store the Filling

The filling is now ready to use in your favorite pie crust or dessert.
For storage, place the filling in a sealed container and refrigerate.
It can be stored for up to three days in the refrigerator.
Ensure the filling is completely cooled before sealing for freshness.
Critical Timing and Temperature Guide
Cooking the Filling: Cook the apple mixture over medium heat for 10-15 minutes. Look for bubbling and a thick consistency. Avoid high heat as it can lead to burning.
Cooling the Filling: Allow the filling to cool at room temperature for 15-20 minutes until it thickens further. Watch for a gel-like texture without being too firm.
Baking in a Pie: If using in a pie, bake at 375°F for 45-50 minutes. The crust should be golden brown, and the filling should bubble through the vents.
Pro Tips for Simple Apple Pie
• Ingredient Selection: Choose a mix of tart and sweet apple varieties, such as Granny Smith and Honeycrisp, for a balanced flavor profile.
• Preparation Secret: Allow the sliced apples to sit in lemon juice for a few minutes to enhance their natural flavor and prevent browning.
• Temperature Management: Keep the filling at room temperature before baking in a pie to ensure even cooking.
• Texture Enhancement: Cook the apples just until tender to maintain a slight bite, preventing a mushy filling.
• Flavor Layering: Add a pinch of ground clove for an extra layer of warmth and complexity.
• Make-Ahead Strategies: Prepare the filling a day in advance and store it in the refrigerator to save time on baking day.
• Restaurant-Quality Finishing Touches: Brush the top crust with egg wash and sprinkle with coarse sugar for a glossy, textured finish.
• Equipment Optimization: Use a pie shield or aluminum foil around the crust edges to prevent over-browning during baking.
Troubleshooting Common Issues
• Filling Too Runny: This can occur if the apples release too much juice. Thicken with additional flour or cook longer to evaporate excess liquid.
• Filling Too Thick: If the filling is too dense, it may need more liquid. Add a splash of apple juice to loosen the consistency.
• Flavor Too Bland: Boost the spices or add a dash of vanilla extract for more depth.
• Apples Not Cooking Evenly: Uneven slices can cause this. Ensure all slices are of similar thickness for uniform cooking.
• Crust Soggy: Pre-bake (blind bake) the crust slightly before adding the filling to prevent sogginess.
• Overly Sweet Filling: Balance with additional lemon juice or a pinch of salt to cut through the sweetness.
Variations and Regional Differences
• French Tarte Tatin: This version involves caramelizing the apples in butter and sugar before baking, resulting in a deep, rich flavor.
• Dutch Apple Pie: Includes a crumbly streusel topping instead of a top crust, offering a different texture contrast.
• New England Apple Pie: Often incorporates a layer of cheddar cheese for a savory twist.
• Southern Fried Apple Pies: Smaller, hand-held pies that are deep-fried, offering a crispy, flaky crust.
Food Science Behind the Recipe
• Maillard Reaction: This browning process occurs during baking, enhancing the flavor and color of the crust and filling.
• Starch Gelatinization: Flour thickens the filling by absorbing water and forming a gel, which gives the filling its desired texture.
• Acid's Role: Lemon juice not only prevents browning but also balances the sweetness and enhances the apple flavor.
Frequently Asked Questions
What's the most common mistake people make when preparing apple pie filling? Overcooking the apples, leading to a mushy texture. It's important to cook them just until tender.
Can I use frozen apples? Yes, but ensure they are fully thawed and drained to avoid excess moisture in the filling.
How can I make the filling less sweet? Reduce the sugar and increase the lemon juice for more tartness.
Is it necessary to peel the apples? Peeling is recommended for a smoother texture, but leaving the skin on can add a rustic feel and additional nutrients.
What type of apples work best for filling? A mix of firm and tart apples like Granny Smith and Honeycrisp provides the best flavor and texture.
How long can the filling be stored? It can be refrigerated for up to three days or frozen for up to three months.
Can I add other fruits? Absolutely, pears or cranberries can complement the apples well.
Why is my filling watery? Insufficient thickening agent or overcooked apples can cause this. Adjust the flour or cook time accordingly.
Is pre-cooking the filling necessary? Pre-cooking ensures the apples are evenly cooked and helps manage the filling's consistency.
Serving and Presentation Guide
• Traditional Presentation: Serve the pie warm with a scoop of vanilla ice cream on top, allowing it to melt into the filling.
• Rustic Style: Present the pie on a wooden board, with a dusting of powdered sugar for a homely touch.
• Elegant Plating: Cut a neat slice and place it on a dessert plate with a drizzle of caramel sauce for added elegance.
• Family Style: Serve the pie directly from the dish at the table, encouraging guests to help themselves.


Conclusion
Embark on a culinary journey with this simple yet flavorful apple pie filling.
Its versatility allows you to explore numerous dessert creations beyond the classic pie.
The aroma and taste will surely make it a staple in your seasonal and holiday baking repertoire.